Category Archives: howto

Articles that provide step by step detail on how to accomplish something

Adventures in SRM 6.0 and MirrorView

Recently, I setup SRM 6.0 with MirrorView storage based replication.  It was quite the adventure.  The environment was using SRM 5.0 and MirrorView, and we upgraded them to vSphere 6.0 and SRM 6.0 recently.  I wanted to get my findings down in case it may help others setting this up.  I found when I ran into issues, it wasn’t easy finding people who were doing this, as many who are using VNXs are using RecoverPoint now instead of MirrorView.

Version Support

First off, you might be wondering why I recently deployed SRM 6.0 instead of 6.1.  That’s an easy question to answer – currently, there is no support for MirrorView with SRM 6.1.  I’m posting this article in 11/2015, so that may change.  Until it does, you’ll need to go with SRM 6.0 if you want to use MirrorView.

Installation of Storage Replication Adapter

I’m assuming you already have installed SRM, and configured the pairings and what not.  At the very least, have SRM installed in both sites before you proceed.

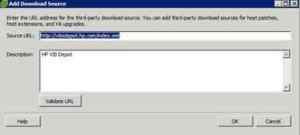
Here’s where things got a little goofy.  First off, downloading the SRA is confusing.  If you go to VMware’s site to download SRA’s, you’ll see two listings for the SRA, with different names, suggesting they work for different arrays, or do something different, or are different components.

mirrorsradownload

They’re actually so far as I can tell two slightly different versions of the SRA.  Why are they both on the site for download?  No idea.  So I went with the newer of the two.

You also need to download and install Navisphere CLI from EMC for the SRA to work.  There are a few gotchas on the install of this to be aware of. Install this first.

During installation, you need to ensure you check the box “Include Navisphere CLI in the system environment path.”

navispherepath

That’s listed in the release notes of the SRA, so that was easy to know.  You also need to select to not store credentials in a security file.

I ended up having issues with the SRA being able to authenticate to the arrays when I originally told it to store credentials thinking this could allow easier manual use of Navisphere CLI should the need arise, but that messed things up, so uninstalled, and reinstalled Navisphere CLI without that option, and the bad authentication messages went away.

Next, install the SRA, which is straight forward.  After the installation of the SRA, you must reboot the SRM servers, or they will not detect that they have SRA’s installed.  That takes care of the SRAs.

Configuring the SRAs

Once you have installed the SRA’s, it’s time to configure the array pairs.  First, go into Site Recovery within the vSphere Web Client, and click Array Based Replication.

arraybasedreplication

Next, click Add Array Manager.

addarraymanager

Assuming you’re adding arrays from two sites, click “Add a pair of array managers”.

addarraypairs

Select the SRM Site location pair for the two arrays.

sralocationpair

Select the SRA type of EMC VNX SRA.

selectsratype

Enter the Display name, the management IPs of the array, filters for the mirrors or consistency groups if you are using MirrorView for multiple applications, and the username and password info for the array for each site.  Be sure to enter the correct array info for the indicated site.

sraarrayinfo

I always create a dedicated SRM service account within the array, so it’s easy to audit when SRM initiates actions on the storage array.

You’ll need to fill the information out for each site’s array.

Keep the array pair checked and click next.

enablearraypairs

Review the summary of action and click finish.

At this point, you can check the array in each site and see if it is aware of your mirrors being replicated.

checksrareplicationinfo

So far so good!  At this point, you should be able to create your protection groups and recovery plans, and start performing tests of a test VM and recoveries as well.

Problems

I began testing a test Consistency Group within MirrorView, which contained one LUN, which stored a test VM.  Test mode worked immediately to DR.  Failover to the DR site failed, as it often does in my experience with most Storage Based Replication deployments.  No problem, I simply launch it again, and it works, and it did in this case.

With the VM then in the DR site, I performed an isolated test back to production, which worked flawlessly.  It’s when I tried to fail back to production I encountered a serious problem.  SRM reported that the LUN could not be promoted.  Within SRM, I was given only the option to try failover again.  The icon was grayed out to do cleanup or a test.  Relaunching failover resulted in the same result.  I tried rebooting both SRM servers, vCenter, running rediscovery of the SRAs, you name it.  I was stuck.

I decided to just manually clean up everything myself.  I promoted the mirror in the production site, had hosts in both sites rescan for storage.  The LUN became unavailable in the DR site, but in production, while the LUN was visible in terms of seeing an available LUN, the datastore wouldn’t mount.  Rebooting the ESXi server didn’t help.  I finally added it as a datastore, selecting not to resignature the datastore.  The datastore mounted, but I found that the datastore wouldn’t mount after a host reboot.  Furthermore, SRM was reporting the MirrorView consistency group was stuck failing over, showing Failover in Progress.  I tried recreating the SRM protection group, re-adding the array pairs, and more, but nothing worked.

After messing with it for awhile, checking MirrorView and the VNX, VMware, etc., I gave up and contacted EMC support, who promptly had me call VMware support, who referred me back to EMC again because it was clearly an SRA problem for EMC.

With EMC’s help, I was able to cleanup the mess SRM/SRA made.

  1. The Failover in Progress reported by the SRA was due to description fields on the MirrorView description view.  Clearing those and rescanning the SRAs fixed that problem.
  2. The test LUN not mounting was due to me not selecting to resignature the VMFS datastore when I added it back in.

At this point, we were back to square one, and I went through the gambit of tests. I got errors because the SRM placeholders were reporting as invalid.  Going to the Protection Group within SRM and issuing the command to recreate the SRM placeholders fixed this issue.

We repeated testing again.  This time, everything worked, even failback.  Why did it fail before?  Even EMC support had no answer.  I suspect it’s because anytime I make the first attempt in a direction in an SRM environment to failover, it always fails.  Unfortunately, it was very difficult to fix this time.

Disable CBT on Veeam jobs via PowerShell

If you haven’t heard the not so great news, VMware has discovered a bug  in vSphere 6 with Change Block Tracking (CBT) that can cause your backups to be corrupt and therefore invalid.  Currently, they are recommending not to use CBT with vSphere 6 when backing up your VMs.

I was looking for an easy way to disable this on all jobs in Veeam quickly via PowerShell, but it’s not obvious how to do that, so I took some time to figure it out.  Here it is assuming the module is loaded in your PowerShell session.

$backupjobs = get-vbrjob | where jobtype -eq "Backup"
foreach ($job in $backupjobs){
$joboptions = $job | get-vbrjoboptions
$joboptions.visourceoptions.UseChangeTracking = $false
$job | set-vbrjoboptions -options $joboptions
}

Here’s now to enable it again:

$backupjobs = get-vbrjob | where jobtype -eq "Backup"
foreach ($job in $backupjobs){
$joboptions = $job | get-vbrjoboptions
$joboptions.visourceoptions.UseChangeTracking = $true
#$joboptions.visourceoptions.EnableChangeTracking = $true
$job | set-vbrjoboptions -options $joboptions
}

Sorry it’s not pretty on the page, but I wanted to get this out ASAP to help anyone needing to do this quickly and effectively.

One thing to note is in the enable script, there’s a commented line out.  If you have already set your jobs manually and wish to use the script to enable CBT again, be aware that the option to enable CBT within VMware if it is turned off gets disabled if you turn CBT off altogether within the job setup.  If you disable CBT with my script, that doesn’t get touched, so you don’t need to remove the # on that line.   If you want that option enabled again, take out the # before that line, and it’ll enable that option again.

Hope this helps!

vSphere 6 – Certificate Management – Part 2

Previously, I posted about certificate management in vSphere 6, which has simplified the process and provided several ways to trust certificates that will be used, while providing flexibility about what will issue the certificates to vSphere internal functionality and client facing functionality as well.

One of the simplest means to allow your clients to trust SSL certificates used by vSphere 6 is to utilize the CA functionality built into vCenter 6, and configure your clients to trust it as a Root CA, which is the focus of this blog post.

Basically, to do this, you need to obtain the root certificates of your vCenter servers, and the install them into your clients Trusted Root CA stores.  Thankfully, this is a relatively straightforward and easy process.

Obtaining Root CA files for vCenter

Obtaining the root CA files for vCenter is very easy.  To do this, simply connect to the FQDN of your vCenter server using HTTPS.  Do not add anything after this, like you may to connect to the vSphere Web Client.  For example, you would use:

https://vcentersvrname.domain.com

Once connected, you will see a link to obtain the vCenter certificates, as you can see below:

Download vCenter root CA certsWhen you download this file, it will be a zip file containing two certificate files for your vCenter server.  If your vCenter server is part of a linked mode installation, you will have two certificate files for every vCenter in the linked mode instance.  The files with an .0 extension are the root CA files you need to import.  Below, you can see the zip file downloaded from a vCenter in a two vCenter server linked mode installation.

vcenterdownloadfile
Extract the contents of the zip file.  Next, rename the .0 files with a .cer extension.  This will allow the files to be easily installed within a Windows machine.  You can then open them to check out the properties of the files if you like.

Installing Root CA file(s)

If you’re familiar with Windows machines, this is pretty straight forward.  You would either import this file into each machine manually, or you can use a Group Policy Object, import the file(s) into it, and refresh your GPO.

That’s it!  Pretty easy to do!  At the very least, you should do this instead of blindly allowing the exception for the untrusted certificate every time, because we all know we aren’t checking the thumbprints of those certs to ensure we’re connecting into the same server, plus this removes the warnings if you’re not creating a permanent exception.

Getting Cisco UCS drivers right with Windows

I’ve already mentioned one pain point with Cisco UCS – drivers – in my previous post concerning vSphere, but the same thing applies to other environments, including Windows servers. You better have the EXACT version Cisco wants for your specific environment. But how do you know which drivers to get, how do you get them, how do you know when you need to upgrade them, and how do you know what drivers you have installed? This post applies to Windows Server, which by extension, includes Hyper-V.

Why is getting the drivers so important?

I want to emphasize that getting the exact right version of Cisco UCS drivers is a big deal! I’ve personally now seen two vSphere environments that had issues because the drivers were not exactly correct. The best part is the issues never turned up during a testing of the environment. Just weird intermittent issues like bad performance, or VMs needing consolidation after backups, or a VM hangs out of nowhere a week or two down the road. Make sure you get the drivers exactly right!  I don’t work with Windows Servers on bare metal nearly as much as VMware, but I’m sure getting the drivers right is equally, if not more, crucial.

How do I install Windows Server 2012 on Cisco UCS?

You have two choices.  One is create a Windows Server installation ISO with the drivers slipstreamed into it, or you can insert the driver image during the routine to install the proper storage driver to see your storage to which you’ll install Windows, which is available from Cisco for download. Also, at least currently, remember that Cisco UCS does not support Windows in a boot from SAN configuration using FCoE.

Remember however you’re still not done.  You’ll need to still update the network card drivers.

How do I know which drivers should be installed?

This is relatively simple. First, collect some info about your Cisco UCS environment. You need to know these (don’t worry, if you don’t know what info you need, Cisco’s Interoperability page will walk you through it):
1. Standalone C-Series not managed by UCSM or UCSM managed B and/or C-Series? For those of you who don’t know, if you got blades, you got UCSM.
2. If UCSM is present, which version is it running? Ex. 2.2(3c)
3. Which server model(s) are present? Ex. B200-M3. Also note the processor type (ex. Xeon E5-2600-v2). They can get picky about that.
4. What OS and major version? Note there is a difference between support for Server 2012 and 2012 R2.  Cisco at least at the time of this blog post does not change support depending upon installed Service Packs.
5. What type and model of I/O cards do you have in your servers? Example – CNA, model VIC-1240

Then head on over to the Interoperability Matrix site.  Fill in your info, and you get a clear version of the driver and firmware.

ucswindriverlookup

It’s very straightforward to know which drivers are needed from that.

How do I figure out which drivers are installed?


You can do this one of two ways.  You can manually check them via Device Manager, or you can use PowerShell.  I’m assuming everyone knows how to check these with Device Manager.  To use PowerShell, use the following:

Get-WmiObject Win32_PnPSignedDriver | select-object devicename,driverversion


Note that you can use the -ComputerName parameter to check a remote system, or even a PowerShell array of remote systems for their drivers easily.

How do I update Cisco UCS drivers?

You need to go to Cisco’s support page for UCS downloads, and download the driver ISO that has your driver, which is typically just the driver ISO with the same version as UCS Manager.  For example, if you’re running 2.2.5(a), you need the 2.2.5 driver ISO.

Next, use the virtual media option within the Cisco KVM, mount the ISO, so it’s ready to go.  You could also extract the contents somewhere on the server, it doesn’t matter.

Next, login to the server, pull up Device Manager, and locate the adapter instances you need to update.  If you’re using a VIC, which is pretty much everyone, you need to find the relevant storage and network adapters.  This example, the customer wasn’t using the FC functionality, so we’re just doing the ENIC devices.

updatingwinucsdrivers

When the dialogue comes up, browse to select the zip file that was *contained* in the original zip file. If you select just the zip file you downloaded itself, it will fail. Repeat for the fnic and enic drivers.

Double click one of the VIC instances, click the Driver tab, note the currently installed driver version, and then Update Driver…

Next, click Browse my computer for driver software.

Next, click “Let me pick from a list of device drivers on my computer”.  Don’t even bother trying any other options, it will continue to want to install the old driver because… REASONS!!!

Next, click Have Disk… and browse on the CD to the right folder for the hardware and OS you’re running.  This is a Server 2012 non-R2 server, so as an example, it’s under Windows\Network\Cisco\VIC\W2K12\x64.

After the driver installs, verify the new driver version is now showing in Device Manager.  Unfortunately, you’re not done yet.  You gotta update the drivers on every other instance, but it’s a little easier for the rest.

For the other instances, double click each one, click Update Drivers…, “Browse my computer for driver software”, “Let me pick from a list of drive drivers on my computer”, and you will see both the old and new driver versions.  Pick the new one, and click Next.

updatingwinucsdrivers2

Rinse and repeat for all instances, and ensure the driver tab reflects the proper new version.  Remember that FNIC HBA drivers will need to be updated on those instances separately under Storage Controllers.

I took a quick look to see if Microsoft made some device driver PowerShell cmdlets, but unfortunately I don’t see any at this time.

When should I check my drivers?

You should do this during any of the following:

• During initial deployments
• When UCS Manager or a standalone C-Series BIOS is updated
• If you update to a new major OS, although I’d check when planning to install Service Packs to Windows as well.

Also, remember, newer drivers aren’t the right drivers necessarily. Check the matrix for what the customer is or will be running to see which drivers should go along with it!

Getting Cisco UCS drivers right with vSphere

I’ve noticed one pain point with Cisco UCS – drivers. You better have the EXACT version Cisco wants for your specific environment. But how do you know which drivers to get, how do you get them, how do you know when you need to upgrade them, and how do you know what drivers you have installed? These are all not necessarily straightforward, and getting the info you need can be a real pain.  This post will show how to accomplish this within vSphere.  For Windows servers, please see my follow-up post due out in a few days.

Why is getting the drivers so important?

I want to emphasize that getting the exact right version of Cisco UCS drivers is a big deal! I’ve personally now seen two environments that had issues because the drivers were not exactly correct. The best part is the issues never turned up during a testing of the environment. Just weird intermittent issues like bad performance, or VMs needing consolidation after backups, or a VM hangs out of nowhere a week or two down the road. Make sure you get the drivers exactly right!

How do I install ESXi on Cisco UCS?

First off, pretty much everyone knows that when you’re installing ESXi on Cisco, HP, Dell, IBM, or other vendor servers, use the vendor’s media. That’s common practice I hope by now. In most but not all cases, you get the drivers you need for an initial deployment from the get go, you get hardware health info within VMware, sometimes management and monitoring tasks for out of band management cards, and you ensure vendor support by doing this. We all know I think by now to do initial ESXi installs with vendor media, in this case Cisco. It’s important for Cisco UCS since so many installs require boot from SAN, that you gotta have those drivers within the media off the bat.

Now, if you think you’re done if you’ve downloaded the latest Cisco co-branded ESXi media for an initial deployment, you’re wrong (see below). Also, don’t assume that just because you use the co-branded media to install ESXi on a UCS server, you never need driver updates. You will likely when you update UCS Manager and/or update ESXi down the road.

How do I know which drivers should be installed?

This is relatively simple. First, collect some info about your Cisco UCS environment. You need to know these (don’t worry, if you don’t know what info you need, Cisco’s Interoperability page will walk you through it):
1. Standalone C-Series not managed by UCSM or UCSM managed B and/or C-Series? For those of you who don’t know, if you got blades, you got UCSM.
2. If UCSM is present, which version is it running? Ex. 2.2(3c)
3. Which server model(s) are present? Ex. B200-M3. Also note the processor type (ex. Xeon E5-2600-v2). They can get picky about that.
4. What OS and major version? Note the Update number. Ex. ESXi 5.5 Update 2
5. What type and model of I/O cards do you have in your servers? Example – CNA, model VIC-1240

Then head on over to the Interoperability Matrix site.  Fill in your info, and you get a clear version of the driver and firmware.

ucsdriverlookup

It’s very straightforward to know which drivers are needed from that.

How do I figure out which drivers are installed?

If you go looking at Cisco for how to find that out, you get treated to esxcli commands.  Do you really want to enable SSH on all your hosts, SSH into each host, run some commands, then have to disable SSH on all those boxes when you’re done, and not have an easy way to document what they are?  Nope!

BEHOLD! POWERCLI!

To get the fnic driver versions for all ESXi hosts:

$hosts = Get-VMHost
$versions = @{}
Foreach($vihost in $hosts){
$esxcli = Get-VMHost $vihost | Get-EsxCli
$versions.Add($vihost, ($esxcli.system.module.get("fnic") |
Select Version))
}
$versions.GetEnumerator() | Sort Name | Format-List 

You get this:

Name : esxi01.vspheredomain.local
Value : @{Version=Version 1.6.0.12, Build: 1331820, Interface: 9.2 Built on: Jun 12 2014}

Hey! That’s the wrong driver, even though I used the latest co-branded media! SON OF A…!

Let’s get some enic driver versions…

$hosts = Get-VMHost
$versions = @{}
Foreach($vihost in $hosts){
$esxcli = Get-VMHost $vihost | Get-EsxCli
$versions.Add($vihost, ($esxcli.system.module.get("enic") |
Select Version))
}
$versions.GetEnumerator() | Sort-Object Name | Format-List 

You get:

Name : esxi01.vspheredomain.local
Value : @{Version=Version 2.1.2.59, Build: 1331820, Interface: 9.2 Built on: Aug 5 2014}

Of course, Cisco apparently didn’t update those drivers in their co-branded media either.

Note for both scripts, you will get errors about get-esxcli not being supported without being connected directly to each host. It works for our purposes.

How do I update Cisco UCS drivers?

Now we know, despite using the latest Cisco co-branded media in my implementation, I need some driver updates. If you go to Cisco’s site for how to install these drivers, they’ll tell you to upload the package to each host and install them one at a time manually using esxcli commands. Do you really want to do that?

Let’s be smart/lazy/efficient and use VMware Update Manager. That way if a new host gets introduced, VUM will report that host non-compliant, and it’ll be easy to fix that one, too. And it’s easy to see which hosts do and don’t have those drivers down the road.

I find if I google the driver version, I find a download from VMware’s site with that exact version first or second link. Here’s our fnic driver and enic driver in this case.

Download those to your vCenter server or something with the vSphere thick client. Unzip them into their own folders. Open up a thick vSphere client connection to vCenter (Web Client won’t allow you to do this), click Home, then click Update Manager.

Next, click Patch Repository tab at the top, and then click Import Patches in the top right.

vumimportpatches

When the dialogue comes up, browse to select the zip file that was *contained* in the original zip file. If you select just the zip file you downloaded itself, it will fail. Repeat for the fnic and enic drivers.

When you’re finished, you can then build a baseline that includes the updated drivers. Click Baselines and Groups, then Create above the baselines pane.

vumcreatebaseline

Call it something like “Cisco UCS Current Drivers”.  Select “Host Extension” as a Host Baseline type.  In the following pain, find the drivers and click the down arrow to add them into the baseline.  Note the Patch ID field has driver version specifics, useful if you’ve already got some Cisco drivers imported before.

vumselectpatches

You can then attach that baseline directly to the appropriate object(s) within the host and clusters view, or I like to make a Baseline Group called “Critical and non-critical patches with Cisco updated drivers”, add all the appropriate baselines to that group, and attach that group to the appropriate objects in the Hosts and Clusters view.

Then remediate your hosts. When new drivers come out, import them in, then edit the Cisco baseline, swapping out the last updated drivers with the new ones, and remediate to push them out.

Done!

When should I check my drivers?

You should do this during any of the following:

• During initial deployments
• When UCS Manager or a standalone C-Series BIOS is updated
• Major ESXi version upgrades
• Update pack upgrades for ESXi (when ESXi 5.5 servers for example are to be upgraded to Update 2, or 3, etc)

Also, remember, newer drivers aren’t the right drivers necessarily. Check the matrix for what the customer is or will be running to see which drivers should go along with it!

Howto: Fix vCenter 5.5 Syslog Collector bug

I just ran into an issue for a customer that is running vCenter 5.5.  Apparently, there is a known issue with the 5.5 version of the syslog collector that causes the debug log to grow indefinitely when it was upgraded  to 5.5 according to the article.  However, the customer in question was built fresh with 5.5, although I did update within 5.5 to newer builds during that time.  Bottom line is it should be checked if they’re running 5.5 version of the syslog collector in all cases to be sure.  The KB article outlines steps to stop this, which basically involves turning off debug logging altogether.

The debug log doesn’t contain actual syslog info for hosts, so this log file is only useful for troubleshooting issues with the syslog collector itself, so it’s almost certainly safe to delete.

Please note this only impacts the syslog collector.  If you did not install the syslog collector, this isn’t applicable.

You can copy and paste the following into an admin elevated PowerShell window to automate stopping the syslog service, changing the config file for the syslog collector to turn off debug logging completely, delete the probably massive debug log, and start the syslog collector again.  You can also save it as a .ps1 file and run it in an elevated prompt as well.

stop-service vmware-syslog-collector
(get-content "C:\ProgramData\VMware\VMware Syslog Collector\vmconfig-syslog.xml") | foreach-object {$_ -replace "<level>1</level>", "<level>0</level>"} | set-content "C:\ProgramData\VMware\VMware Syslog Collector\vmconfig-syslog.xml"
remove-item "C:\ProgramData\VMware\VMware Syslog Collector\logs\debug.log"
start-service vmware-syslog-collector

This assumes of course the syslog collector is running on a Windows machine, not the vCenter Appliance.  The article doesn’t seem to make clear if this issue only applies to the Windows version of Vcenter, and how to fix the vCenter Appliance if the issue did impact it as well.

Hope this helps!

Fix AD Lingering Objects with PowerShell

I briefly ran a blog before on wordpress.com, and most of the information there is outdated, or probably not relevant today, but there are a few posts that I’ve found little else on the internet to address.  These typically harken back to my AD/Exchange heavy days, but they’re still relevant today.  One of those posts is how to fix Active Directory lingering objects using PowerShell.

I ran into a problem in a large forest with multiple child domains and lots of domain controllers – 10 domains and 275 domain controllers!

To protect identities, let’s assume a forest consisted of domain.com, with two child domains – child1.domain.com and child2.domain.com.  Each domain has 2 global catalog servers (gc1, gc2), and one domain controller that is not a global catalog (dc1).

What are lingering objects anyway?

Remember that at least one domain controller in each domain must be a global catalog server.  GC’s have a copy of all objects in the forest, but only a subset of each object’s properties is found in AD.  For all objects in a GC that are not in that domain controller’s domain, the GC has a read-only copy.  You cannot manually go in and alter, create, or delete objects directly in the Global Catalog for objects that reside in another domain.

Lingering objects occur when through a variety of ways, a global catalog in one domain ends up with objects that no longer exist in another domain.  For example, let’s say a user exists in child2.domain.com and is deleted.  If somehow this doesn’t replicate to a GC in child1.domain.com or domain.com, the global catalogs in domain.com and child1.domain.com now have that user as a lingering object.  This can occur through a variety of ways, such as replication failures, or a global catalog server was disconnected for a long period of time.

Further info can be found here.

To find if you have lingering objects on a domain controller, you must run the following command:

repadmin /removelingeringobjects ServerName ServerGUID DirectoryPartition /advisory_mode

Simply remove the /advisory_mode switch to remove lingering objects.

ServerName is the fully qualified domain name of a global catalog that has lingering objects.  ServerGUID is a domain controller’s GUID from the domain that the lingering object is from, and you’d like to use it as a reference.  DirectoryPartition is the distinguished name of the GC partition with the lingering object.  Usually, lingering objects are computer or user account objects, so this would look like dc=domain,dc=com.
Finding the DC’s GUID can be done by looking in the forward lookup zone _msdcs.domain.com.

Lingering objects can cause problems with outdated or invalid group membership, problems with address book generation with Exchange, or basically problems with anything that depends upon valid info within the global catalog.  It can even cause replication failures depending upon your global catalog replication topology, and if you have strict replication enabled.

Scenario
Let’s say you suspect gc1.child1.domain.com has lingering objects from child2.domain.com.  You would first need a GUID of a DC in child2.domain.com that you believe has accurate domain information.  Let’s say you believe that dc is GC2.child2.domain.com.  Use the DNS MMC, connect to a DNS server hosting domain.com, look in the _msdcs.domain.com zone, and you will see all domain controllers in your forest.  Copy the GUID to your clipboard.  Let’s say GC2.child2.domain.com’s GUID is:

85d158d2-a006-4fff-b1e5-f9b6eaabab2b

You would then run:
repadmin /removelingeringobjects gc1.child1.domain.com 85d158d2-a006-4fff-b1e5-f9b6eaabab2b dc=child2,dc=domain,dc=com /advisory_mode

Note you need the Windows Support Tools installed.

This isn’t so tough.

However, if you suspected all your global catalogs had lingering objects for this domain, you’d need to run this command for each GC not in child2.domain.com.  Not terrible for this small of an environment.  To fix them, just chop off the advisory mode switch, and you’re done.

Think Big!

What if your environment was a 10 domain forest with over 100 domain controllers, and no predictable pattern of which domain controllers were global catalogs and which weren’t?!  Even if you knew which were global catalogs, who wants to issue that many commands?!

Wouldn’t it be nice is if we could issue this command to every global catalog not in child2.domain.com (since their GC’s have writable copies of the partition, theirs would be correct and would fix lingering objects on their own)?

That is what I faced.  I found replication wasn’t occuring for a domain partition in the global catalog because strict replication was enabled, and all global catalogs outside of a particular domain had lingering objects.  Talk about a pain in the butt!  Unless of course…
PowerShell to the rescue!

We can easily get all the global catalogs in the forest:
$forest = [system.directoryservices.activedirectory.Forest]::GetCurrentForest()
$forest.globalcatalogs | select-object name

You would receive output of the fully qualified domain names of all global catalogs.
But wait.  We only want GC’s that are NOT in child2.domain.com.  Simple enough with a where-object filter.

$forest.globalcatalogs | where-object {$_.name -notlike “*.child2.domain.com”} | select-object name

Now we just need to set this to a variable, so we add “$gcs = “ to the beginning of the second line.  This will allow us to have an array we can then perform an action or command on.  The last part is a bit tricky because we’re intermixing PowerShell with a standard command line.  Usually, you need to use the ‘ character around phrases.  Also, in this case, we’ve actually grabbed objects within the $gcs variable, so we want to make sure we’re not passing any other properties or code associated to objects.  We literally just want the name of each to be passed.  Remember, $_ means every object in the pipeline.  By adding .name, we’re saying don’t pass any other output related to each object in the array other than it’s name.  Without it, you get errors because PowerShell is putting extra characters in for each Global Catalog.

Final commands:

$forest = [system.directoryservices.activedirectory.Forest]::GetCurrentForest()
$gcs = $forest.globalcatalogs | where-object {$_.name -notlike "*.child2.domain.com"} | select-object name
$gcs | foreach-object {repadmin /removelingeringobjects $_.name 85d158d2-a006-4fff-b1e5-f

VMware dedicated swapfile datastores

Dedicated swapfile datastores in VMware are often overlooked.   Here’s why you might use them, and how to size them easily with PowerCLI.

It’s very often advisable to create dedicated swapfile datastores in your VMware vSphere environment.   There are numerous benefits:

  • Ensure there’s room to start a VM
  • Use different storage type than what the working directory uses for performance or cost savings
  • Reduce replication traffic when using storage based replication, because there’s no reason to replicate this storage
  • You may want to snapshot storage that runs VMs for easy recoverability, but there’s no reason to snapshot swapfile

If you decide to create dedicated datastores, you want to use the following principles:

  • Create datastores that are resilient, so that VMs can be started
  • Have hosts that frequently have VMs VMotion between them, such as a cluster, use the same datastores to reduce vMotion network traffic
  • Carefully monitor their space, and size them correctly, and allow for some overhead for growth.

The swapfile size for each VM is determined by the following:

  • The VM’s defined RAM minus the RAM reservation for that VM.

For example, if a VM is defined as having 8GBs, but the reservation for RAM is set for 2GBs, a 6GB swapfile will be created.  By default, a VM has no reservation for RAM.

That means that this datastore space consumption can fluctuate as VMs are built, powered off and on, whenever RAM is added or removed from a VMs definintion, or if its memory reservation is adjusted.

This begs the question – How do you easily size for these datastores easily?  Harnass PowerShell by using PowerCLI!  Simply tune the $vms variable portion or what’s piping to it of the following to grab the VMs that will likely VMotion between the same hosts.  This would usually be by cluster.

$vms = get-cluster clustername | get-vm
$RAMDef = $vms | Measure-Object -Sum memoryGB | select-object sum -expand sum
$RAMResSum = $vms | get-VMResourceConfiguration | measure-object -sum memreservationGB | select-object sum -expand sum
$SwapDatastore = $RamDef - $RamResSum
Write-Host "Defined amount of RAM within VMs is $RAMDef GBs"
Write-Host "Memory reservation for VMs is $RamResSum GBs"
Write-Host "A datastore of at least $SwapDatastore GBs will be needed, plus overhead."

Output will look like this:

Defined amount of RAM within VMs is 218 GBs
Memory reservation for VMs is 0 GBs
A datastore of at least 218 GBs will be needed, plus overhead.

For overhead, you want to keep at least 25% free probably minimum just to keep datastore free space alarms from going off, plus any additional growth from the factors outlined above, mostly centered around new VMs being built.

Many customers balk when told how big the swapfile datastore will be, but you have to remember if you’re changing this within a customer’s environment, they’re going to gain back swapfile space within their existing datastores as swapfiles get placed on the dedicated datastore.

Also, think of the potential storage space savings you could get if you are storage snapshotting your VM datastores, and replicating, plus the bandwidth savings.  Let’s say you have VMs that in aggregate are defined with 500GBs of RAM with no memory reservation.  If you’re doing both snapshots and replication and didn’t dedicate a datastore to the swapfiles, you’re talking savings of 500GBs of replication space, and up to 1TB worth of space savings alone depending upon how much additional space the swapfiles are taking within your storage snapshots.  Pretty worth it!

How do you migrate existing swapfiles?

  1. First, set your cluster to use the host’s swapfile setting instead of the cluster’s.
  2. Set all your hosts to use the same datastore.

To do this in PowerCLI:

$cluster = "clustername"
$swapfiledatastore = "swapfiledatastorename"
get-cluster $cluster | set-cluster -VMSwapfilePolicy InHostDataStore

You’ll have to manually set the host’s cluster datastore with the web or thick client.  PowerCLI fails to set the heartbeat datastore if the host is in a cluster unfortunately.

You should see the swapfiles deleted from the VMs’ working directories and created in the new datastore as VMs are power cycled.

Auto download/install Dell/HP updates with VUM

Recently, I had a customer run into an issue with a bug in the HP agents included within their co-branded installation media, so I came to realize the importance of updating server vendor custom software.

http://kb.vmware.com/kb/2085618

I decided to look into how to manage updating those a little easier since I’m having to update this kind of thing for customers lately. It turns out with Dell and HP, it’s not tough. (And BTW, Cisco and IBM – come on and get with the times on this!)

Did you know you can add a Dell and/or HP download repository for VUM to check for these updates for you? I knew you could, but I’ve never done it until now since we typically have customers maintain their stuff, but I’m involved in a few customers who want me to do it for whatever reason. And hey, I’m lazy, so screw doing this the hard way.

Here’s how:
Open the full vSphere Client with the VUM plugin installed and enabled. Open the Update Manager management section. Click on the Configuration tab -> Download Settings. Then, click on Add Download Source.

vumadddownloadsource

Next, enter the source URL for your server manufacturer:

Dell: http://vmwaredepot.dell.com/index.xml

HP: http://vibsdepot.hp.com/index.xml

Edit:  HP’s download locations have changed!  Use:

Drivers: http://vibsdepot.hpe.com/index-drv.xml

All other components: http://vibsdepot.hpe.com/index.xml

Enter a description like “HP VIB Depot”.  Click on Validate URL to ensure that’s good, and OK.vumdownloadsource

Boom, take a look and make sure the connectivity status is Connected, and you can click Download Now if you want to get the latest updates from them immediately.

Now you need to make a baseline that includes the patches, and you can make a dynamic baseline to automatically update with the latest ones.  Go to the baselines tab, create a baseline, name it something with the software vendor name and ESXi version and select the Host Patch type.  For Patch Options, select Dynamic.  For criteria, select the server vendor, and the specific version of ESXi you’re updating.  Note, this baseline will only work for a specific major version of ESXi.  If you don’t select a version to include all version patches, you’ll get errors when you remediate.vumbaselinecriteria

Next, you can select any patch to exclude anything you don’t want installed.  Newer versions supersede the older ones, so there’s no need to exclude anything unless the latest version you know causes problems.vumbaselineexclusions


There probably isn’t a reason to add additional Updates manually to this baseline.  If you need to add other patches, make another baseline for that, and include everything you want in a baseline group.vumaddadditionalpatches


Now add the new baseline to the appropriate Baseline groups as needed, scan and remediate, and you’re off to the races.

How cool is that?