I’ve noticed one pain point with Cisco UCS – drivers. You better have the EXACT version Cisco wants for your specific environment. But how do you know which drivers to get, how do you get them, how do you know when you need to upgrade them, and how do you know what drivers you have installed? These are all not necessarily straightforward, and getting the info you need can be a real pain. This post will show how to accomplish this within vSphere. For Windows servers, please see my follow-up post due out in a few days.
Why is getting the drivers so important?
I want to emphasize that getting the exact right version of Cisco UCS drivers is a big deal! I’ve personally now seen two environments that had issues because the drivers were not exactly correct. The best part is the issues never turned up during a testing of the environment. Just weird intermittent issues like bad performance, or VMs needing consolidation after backups, or a VM hangs out of nowhere a week or two down the road. Make sure you get the drivers exactly right!
How do I install ESXi on Cisco UCS?
First off, pretty much everyone knows that when you’re installing ESXi on Cisco, HP, Dell, IBM, or other vendor servers, use the vendor’s media. That’s common practice I hope by now. In most but not all cases, you get the drivers you need for an initial deployment from the get go, you get hardware health info within VMware, sometimes management and monitoring tasks for out of band management cards, and you ensure vendor support by doing this. We all know I think by now to do initial ESXi installs with vendor media, in this case Cisco. It’s important for Cisco UCS since so many installs require boot from SAN, that you gotta have those drivers within the media off the bat.
Now, if you think you’re done if you’ve downloaded the latest Cisco co-branded ESXi media for an initial deployment, you’re wrong (see below). Also, don’t assume that just because you use the co-branded media to install ESXi on a UCS server, you never need driver updates. You will likely when you update UCS Manager and/or update ESXi down the road.
How do I know which drivers should be installed?
This is relatively simple. First, collect some info about your Cisco UCS environment. You need to know these (don’t worry, if you don’t know what info you need, Cisco’s Interoperability page will walk you through it):
1. Standalone C-Series not managed by UCSM or UCSM managed B and/or C-Series? For those of you who don’t know, if you got blades, you got UCSM.
2. If UCSM is present, which version is it running? Ex. 2.2(3c)
3. Which server model(s) are present? Ex. B200-M3. Also note the processor type (ex. Xeon E5-2600-v2). They can get picky about that.
4. What OS and major version? Note the Update number. Ex. ESXi 5.5 Update 2
5. What type and model of I/O cards do you have in your servers? Example – CNA, model VIC-1240
Then head on over to the Interoperability Matrix site. Fill in your info, and you get a clear version of the driver and firmware.

It’s very straightforward to know which drivers are needed from that.
How do I figure out which drivers are installed?
If you go looking at Cisco for how to find that out, you get treated to esxcli commands. Do you really want to enable SSH on all your hosts, SSH into each host, run some commands, then have to disable SSH on all those boxes when you’re done, and not have an easy way to document what they are? Nope!
BEHOLD! POWERCLI!
To get the fnic driver versions for all ESXi hosts:
$hosts = Get-VMHost
$versions = @{}
Foreach($vihost in $hosts){
$esxcli = Get-VMHost $vihost | Get-EsxCli
$versions.Add($vihost, ($esxcli.system.module.get("fnic") |
Select Version))
}
$versions.GetEnumerator() | Sort Name | Format-List
You get this:
Name : esxi01.vspheredomain.local
Value : @{Version=Version 1.6.0.12, Build: 1331820, Interface: 9.2 Built on: Jun 12 2014}
Hey! That’s the wrong driver, even though I used the latest co-branded media! SON OF A…!
Let’s get some enic driver versions…
$hosts = Get-VMHost
$versions = @{}
Foreach($vihost in $hosts){
$esxcli = Get-VMHost $vihost | Get-EsxCli
$versions.Add($vihost, ($esxcli.system.module.get("enic") |
Select Version))
}
$versions.GetEnumerator() | Sort-Object Name | Format-List
You get:
Name : esxi01.vspheredomain.local
Value : @{Version=Version 2.1.2.59, Build: 1331820, Interface: 9.2 Built on: Aug 5 2014}
Of course, Cisco apparently didn’t update those drivers in their co-branded media either.
Note for both scripts, you will get errors about get-esxcli not being supported without being connected directly to each host. It works for our purposes.
How do I update Cisco UCS drivers?
Now we know, despite using the latest Cisco co-branded media in my implementation, I need some driver updates. If you go to Cisco’s site for how to install these drivers, they’ll tell you to upload the package to each host and install them one at a time manually using esxcli commands. Do you really want to do that?
Let’s be smart/lazy/efficient and use VMware Update Manager. That way if a new host gets introduced, VUM will report that host non-compliant, and it’ll be easy to fix that one, too. And it’s easy to see which hosts do and don’t have those drivers down the road.
I find if I google the driver version, I find a download from VMware’s site with that exact version first or second link. Here’s our fnic driver and enic driver in this case.
Download those to your vCenter server or something with the vSphere thick client. Unzip them into their own folders. Open up a thick vSphere client connection to vCenter (Web Client won’t allow you to do this), click Home, then click Update Manager.
Next, click Patch Repository tab at the top, and then click Import Patches in the top right.

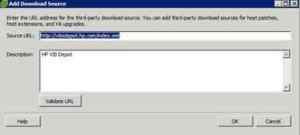
When the dialogue comes up, browse to select the zip file that was *contained* in the original zip file. If you select just the zip file you downloaded itself, it will fail. Repeat for the fnic and enic drivers.
When you’re finished, you can then build a baseline that includes the updated drivers. Click Baselines and Groups, then Create above the baselines pane.

Call it something like “Cisco UCS Current Drivers”. Select “Host Extension” as a Host Baseline type. In the following pain, find the drivers and click the down arrow to add them into the baseline. Note the Patch ID field has driver version specifics, useful if you’ve already got some Cisco drivers imported before.

You can then attach that baseline directly to the appropriate object(s) within the host and clusters view, or I like to make a Baseline Group called “Critical and non-critical patches with Cisco updated drivers”, add all the appropriate baselines to that group, and attach that group to the appropriate objects in the Hosts and Clusters view.
Then remediate your hosts. When new drivers come out, import them in, then edit the Cisco baseline, swapping out the last updated drivers with the new ones, and remediate to push them out.
Done!
When should I check my drivers?
You should do this during any of the following:
• During initial deployments
• When UCS Manager or a standalone C-Series BIOS is updated
• Major ESXi version upgrades
• Update pack upgrades for ESXi (when ESXi 5.5 servers for example are to be upgraded to Update 2, or 3, etc)
Also, remember, newer drivers aren’t the right drivers necessarily. Check the matrix for what the customer is or will be running to see which drivers should go along with it!